

If you wonder how can you clean a beauty blender safely, the process is simple. Use warm water, a gentle cleanser, and light squeezing to remove makeup. Rinse until the water runs clear, then let the sponge dry completely. Regular washing also helps keep old makeup and oils away from your skin.
A makeup sponge can hold foundation, concealer, skin oils, and moisture after each application. Those materials can build up quickly inside its porous surface. The American Academy of Dermatology recommends cleaning makeup sponges after every use. Clean tools may also reduce exposure to residue that can contribute to breakouts or irritation.
Quick Cleaning Guide
| Question | Best Practice |
|---|---|
| Water temperature | Warm or lukewarm |
| Cleaner | Gentle sponge cleanser or mild liquid cleanser |
| Cleaning frequency | After every use |
| Main technique | Wet, lather, gently squeeze, rinse |
| Drying method | Air dry in an open, ventilated area |
| Avoid | Boiling water, microwaving, harsh scrubbing |
| Replacement timing | About every three months with regular use |
| Mold present | Stop using the sponge |
Beautyblender recommends washing its sponge after each use and drying it completely. The brand also advises replacing a regularly used sponge about every three months. Mold, tears, lost bounce, or persistent damage are signs that replacement may be necessary.
Direct answer: Wet your makeup sponge with warm water and add a gentle cleanser. Massage and squeeze it carefully until old makeup starts leaving the foam. Rinse under clean water until no soap or tinted residue remains. Remove extra moisture with a clean towel, then air dry it fully in an open space.
What You Need Before Cleaning
You do not need complicated equipment for routine cleaning. Warm running water and a suitable cleanser handle most everyday makeup buildup. A clean towel or paper towel helps remove extra moisture afterward. A small bowl can also help when the sponge needs soaking.
Choose a cleanser that rinses easily and does not leave heavy residue. Beautyblender recommends products made for makeup sponges and warns against harsh cleaners. Its current guidance specifically discourages alcohol formulas and extreme heat.
You may also use a textured silicone cleansing pad for stubborn makeup. Use light pressure because aggressive rubbing can damage soft foam. Fingernails can also catch the sponge and create small tears. Gentle compression is safer than twisting or wringing.
How Can You Clean a Beauty Blender Step by Step?
1. Saturate the Sponge With Warm Water
Hold the sponge under warm running water until it expands and feels fully saturated. Water helps loosen foundation and other products trapped inside the foam. Avoid extremely hot water because excess heat can damage the material. Warm water is enough for normal cleaning.
2. Apply a Gentle Cleanser
Place a small amount of cleanser directly onto the damp sponge. Work it across the areas with the heaviest makeup staining. A cleanser made for cosmetic sponges is a safe choice. You can also follow the care instructions supplied with your specific sponge.
For more skincare and cleansing information, NewPape also covers oil cleansers and makeup removal methods. That guide focuses on facial cleansing rather than tool care. Still, it explains why removing makeup residue carefully matters in a regular beauty routine.
3. Massage and Squeeze Gently
Use your fingers to work the cleanser through the wet foam. Compress the sponge repeatedly instead of twisting it. This movement pushes makeup and cleanser through the pores. Keep your nails from digging into the surface.
The sponge may release foundation-colored water during this stage. Keep working the cleanser until the residue is less visible. Heavy foundation buildup may require another small amount of cleanser. Patience works better than aggressive scrubbing.
4. Rinse Until the Water Runs Clear
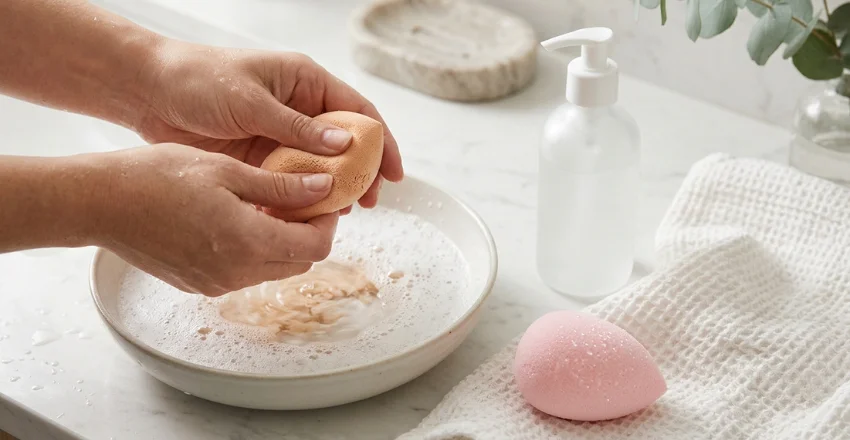
Hold the sponge under warm running water and squeeze it repeatedly. Continue rinsing until soap and visible makeup stop leaving the foam. The American Academy of Dermatology recommends rinsing until the water runs clear. This helps remove both cleanser and loosened residue.
Do not assume one quick rinse is enough after heavy makeup use. Product can remain deeper inside a porous sponge. Beautyblender recommends repeating the lather-and-rinse process if residue remains. Press the sponge and check whether tinted water still appears.
5. Deep Clean Stubborn Buildup When Needed
A stained sponge sometimes needs more than routine washing. Soak it briefly in warm water with a suitable cleanser to loosen stubborn residue. Massage the foam again after soaking. Then rinse it thoroughly under clean running water.
Beautyblender also suggests longer soaking for difficult stains with its liquid cleanser. A stain alone does not always mean the sponge is dirty. Makeup pigments can discolor foam even after proper washing. Texture, smell, mold, and condition matter when deciding whether replacement is needed.
6. Remove Excess Water Without Wringing
Once rinsing is complete, press the sponge gently between clean hands. You can also roll or press it into a clean towel. This removes extra moisture without stretching the foam. Do not twist it like a wet washcloth.
Rough squeezing can weaken the sponge and change its shape over time. Small tears can also grow with repeated use. Keeping pressure controlled protects the soft structure. That helps the applicator remain springy for makeup application.
7. Air Dry in a Ventilated Area
Place the clean sponge somewhere with good airflow. Leave it uncovered until it becomes fully dry. A clean paper towel or ventilated holder works well. Avoid sealing a damp sponge inside a makeup bag or closed container.
Beautyblender specifically advises drying its sponges in clean, well-ventilated areas. Damp storage can encourage unwanted microbial growth and mold. The company says users should stop using it if visible mold develops.
How Often Should You Wash a Makeup Sponge?
Clean your sponge after every use when possible. Both dermatologist guidance and the Beautyblender brand recommend this routine. Frequent washing limits the accumulation of cosmetics, oils, and moisture. It also makes deep cleaning less difficult later.
Daily cleaning may sound inconvenient at first. It becomes easier when you wash the sponge immediately after applying makeup. Fresh foundation usually releases faster than dried layers. Keeping cleanser near your sink can make the habit easier.
Your wider skincare habits matter too. NewPape’s guide to proper shaving and skin preparation also emphasizes gentle skin care. Clean makeup tools fit the same general principle. Reducing avoidable irritation starts with careful routines and clean products.
Can You Use Dish Soap?
Some online cleaning methods recommend household dish soap. Beautyblender’s current guidance says harsh dish detergents may affect the sponge’s softness. A dedicated sponge cleanser is the safer option for the branded product.
If you own another sponge brand, check its care instructions first. Materials and manufacturer recommendations can differ. A mild cleanser that rinses completely may be acceptable for some products. Avoid assuming every sponge tolerates the same cleaner.
A facial cleanser is not automatically a suitable substitute either. Some contain active ingredients or fragrances that were designed for skin. They may not rinse from foam as easily as expected. Using the product maker’s recommended cleaning method lowers uncertainty.
Should You Microwave a Makeup Sponge?
Do not rely on a microwave as your standard cleaning method. Beautyblender specifically advises against microwaving its sponge. High temperatures can damage the foam or create a burn risk. Warm water and cleanser provide a safer cleaning process.
Boiling water is also unnecessary for routine washing. Excessive heat can weaken a soft cosmetic sponge. A clean-looking tool is not worth damaging its structure. Stick with warm water and repeated rinsing instead.
How to Clean a Sponge With Heavy Foundation Stains
Long-wear foundation can cling more stubbornly than light products. Start by fully saturating the sponge before adding cleanser. Work the soap through the darkest areas with gentle compressions. Then rinse and repeat the cycle if tinted residue remains.
You can also use a silicone cleansing mat with light pressure. Beautyblender recommends textured cleaning tools for stubborn buildup. Avoid grinding the foam against rough household surfaces. A damaged sponge can become harder to use evenly.
For related beauty and lifestyle reading, you can browse NewPape’s latest coverage. Keeping makeup tools clean supports the same practical self-care approach. Small maintenance habits often make beauty routines easier to manage.
When Should You Replace the Sponge?
Cleaning cannot make a makeup sponge last forever. Beautyblender recommends replacing its sponge around every three months with regular use. A sponge may need earlier replacement if it tears or loses its original texture. Visible mold is a reason to stop using it immediately.
Pay attention to smell and performance as well. A properly cleaned sponge should not remain musty after drying. Repeated tearing or crumbling also shows that the material is breaking down. Replacement is better than trying to repair damaged foam.
Stains alone require more judgment. Some pigment can remain after the sponge is thoroughly rinsed. Check whether clean water comes out when you press it. Persistent residue, odor, or structural damage matters more than color alone.
Common Cleaning Mistakes to Avoid
Many cleaning problems come from using too much force. Twisting, picking, or scraping can tear the porous foam. High heat can also shorten the sponge’s useful life. Closed storage while damp creates another avoidable problem.
Avoid these common mistakes:
- Microwaving the sponge.
- Using boiling water.
- Scrubbing aggressively with fingernails.
- Leaving cleanser trapped inside the foam.
- Storing the sponge while it is damp.
- Sharing a used sponge with another person.
- Continuing to use a sponge with visible mold.
- Waiting weeks between washes.
Sharing makeup tools can transfer material between users. The American Academy of Dermatology recommends not sharing cosmetics applied directly with brushes or sponges. Clean personal tools are easier to manage hygienically.
Frequently Asked Questions
How can you clean a beauty blender without special cleanser?
Use warm water and a gentle cleanser that suits the sponge’s care instructions. Work the cleanser through the foam using light squeezing motions. Rinse repeatedly until the water becomes clear. Avoid harsh detergents or extreme heat if the manufacturer warns against them.
Can I wash my makeup sponge with hand soap?
That depends on the soap and the sponge manufacturer. Strong fragrances or harsh formulas may leave residue or affect the material. A cleanser made for cosmetic tools removes much of that uncertainty. Always rinse until no soap remains.
How long does a makeup sponge take to dry?
Drying time changes with airflow, humidity, sponge size, and room conditions. Leave the sponge exposed in a clean, ventilated location until fully dry. Do not judge dryness only from the outer surface. The center can remain damp longer.
Is it normal for a new sponge to lose color?
Some Beautyblender products may release water-soluble dye during early washes. The company says this can happen during the first few cleanings. Dye release should not be confused automatically with makeup residue. Follow the manufacturer’s instructions for your specific product.
What should I do if my sponge has mold?
Stop using it if you notice visible mold. Beautyblender advises discontinuing use when mold appears. Replace the sponge rather than trying to restore it. Keep future sponges ventilated while drying.
Keep Your Makeup Sponge Clean Without Damaging It
The safest routine uses warm water, gentle cleanser, careful squeezing, and thorough rinsing. Drying matters as much as washing because moisture can remain inside the foam. Making cleaning part of every makeup session keeps residue from building up. It also makes each wash faster and easier.
Skip microwave tricks, boiling water, and rough scrubbing. Replace the sponge when its condition shows that cleaning is no longer enough. A simple routine protects the applicator without adding complicated steps. Keep your cleanser near the sink so washing becomes an automatic part of your beauty routine.